How to use Passwordless Login Link Authentication
Login links, also called "magic links", are a passwordless authentication mechanism. Whenever a user wants to login, a new link is generated and sent to them (e.g. using an email). The link fully authenticates the user in the application when clicking on it.
This authentication method can help you eliminate most of the customer support related to authentication (e.g. I forgot my password, how can I change or reset my password, etc.)
Using the Login Link Authenticator
This guide assumes you have setup security and have created a user object in your application.
1) Configure the Login Link Authenticator
The login link authenticator is configured using the login_link option
under the firewall and requires defining two options called check_route
and signature_properties (explained below):
1
2
3
4
5
6
7
# config/packages/security.yaml
security:
    firewalls:
        main:
            login_link:
                check_route: login_check
signature_properties: ['id']The signature_properties are used to create a signed URL. This must
contain at least one property of your User object that uniquely
identifies this user (e.g. the user ID). Read more about this setting
further down below.
The check_route must be the name of an existing route and it will be used to
generate the login link that will authenticate the user. You don't need a
controller (or it can be empty) because the login link authenticator will
intercept requests to this route:
1 2 3 4 5 6 7 8 9 10 11 12 13 14
// src/Controller/SecurityController.php
namespace App\Controller;
use Symfony\Bundle\FrameworkBundle\Controller\AbstractController;
use Symfony\Component\Routing\Attribute\Route;
class SecurityController extends AbstractController
{
#[Route('/login_check', name: 'login_check')]
public function check(): never
{
throw new \LogicException('This code should never be reached');
}
}2) Generate the Login Link
Now that the authenticator is able to check the login links, you can create a page where a user can request a login link.
The login link can be generated using the LoginLinkHandlerInterface. The correct login link handler is autowired for you when type-hinting for this interface:
1 2 3 4 5 6 7 8 9 10 11 12 13 14 15 16 17 18 19 20 21 22 23 24 25 26 27 28 29 30 31 32 33 34 35
// src/Controller/SecurityController.php
namespace App\Controller;
use App\Repository\UserRepository;
use Symfony\Bundle\FrameworkBundle\Controller\AbstractController;
use Symfony\Component\HttpFoundation\Request;
use Symfony\Component\HttpFoundation\Response;
use Symfony\Component\Routing\Attribute\Route;
use Symfony\Component\Security\Http\LoginLink\LoginLinkHandlerInterface;
class SecurityController extends AbstractController
{
#[Route('/login', name: 'login')]
public function requestLoginLink(LoginLinkHandlerInterface $loginLinkHandler, UserRepository $userRepository, Request $request): Response
{
// check if form is submitted
if ($request->isMethod('POST')) {
// load the user in some way (e.g. using the form input)
$email = $request->getPayload()->get('email');
$user = $userRepository->findOneBy(['email' => $email]);
// create a login link for $user this returns an instance
// of LoginLinkDetails
$loginLinkDetails = $loginLinkHandler->createLoginLink($user);
$loginLink = $loginLinkDetails->getUrl();
// ... send the link and return a response (see next section)
}
// if it's not submitted, render the form to request the "login link"
return $this->render('security/request_login_link.html.twig');
}
// ...
}1 2 3 4 5 6 7 8 9
{# templates/security/request_login_link.html.twig #}
{% extends 'base.html.twig' %}
{% block body %}
<form action="{{ path('login') }}" method="POST">
<input type="email" name="email">
<button type="submit">Send Login Link</button>
</form>
{% endblock %}In this controller, the user is submitting their email address to the controller. Based on this property, the correct user is loaded and a login link is created using createLoginLink().
Caution
It is important to send this link to the user and not show it directly, as that would allow anyone to login. For instance, use the mailer component to mail the login link to the user. Or use the component to send an SMS to the user's device.
3) Send the Login Link to the User
Now the link is created, it needs to be sent to the user. Anyone with the link is able to login as this user, so you need to make sure to send it to a known device of them (e.g. using e-mail or SMS).
You can send the link using any library or method. However the login link authenticator provides integration with the Notifier component. Use the special LoginLinkNotification to create a notification and send it to the user's email address or phone number:
1 2 3 4 5 6 7 8 9 10 11 12 13 14 15 16 17 18 19 20 21 22 23 24 25 26 27 28 29 30 31 32 33 34 35 36 37 38
// src/Controller/SecurityController.php
// ...
use Symfony\Component\Notifier\NotifierInterface;
use Symfony\Component\Notifier\Recipient\Recipient;
use Symfony\Component\Security\Http\LoginLink\LoginLinkNotification;
class SecurityController extends AbstractController
{
#[Route('/login', name: 'login')]
public function requestLoginLink(NotifierInterface $notifier, LoginLinkHandlerInterface $loginLinkHandler, UserRepository $userRepository, Request $request): Response
{
if ($request->isMethod('POST')) {
$email = $request->getPayload()->get('email');
$user = $userRepository->findOneBy(['email' => $email]);
$loginLinkDetails = $loginLinkHandler->createLoginLink($user);
// create a notification based on the login link details
$notification = new LoginLinkNotification(
$loginLinkDetails,
'Welcome to MY WEBSITE!' // email subject
);
// create a recipient for this user
$recipient = new Recipient($user->getEmail());
// send the notification to the user
$notifier->send($notification, $recipient);
// render a "Login link is sent!" page
return $this->render('security/login_link_sent.html.twig');
}
return $this->render('security/request_login_link.html.twig');
}
// ...
}Note
This integration requires the Notifier and Mailer components to be installed and configured. Install all required packages using:
1 2 3
$ composer require symfony/mailer symfony/notifier \
symfony/twig-bundle twig/extra-bundle \
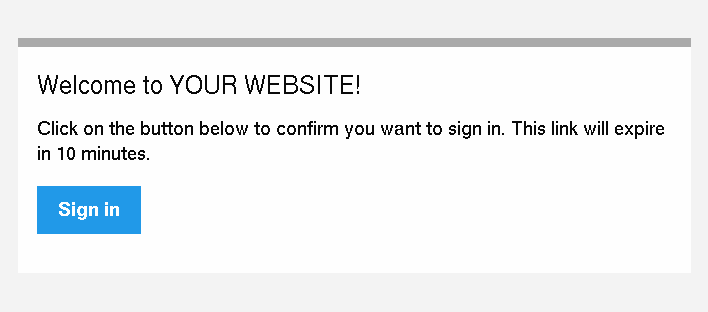
twig/cssinliner-extra twig/inky-extraThis will send an email like this to the user:
Tip
You can customize this e-mail template by extending the
LoginLinkNotification and configuring another htmlTemplate:
1 2 3 4 5 6 7 8 9 10 11 12 13 14 15 16 17 18 19 20
// src/Notifier/CustomLoginLinkNotification
namespace App\Notifier;
use Symfony\Component\Notifier\Message\EmailMessage;
use Symfony\Component\Notifier\Recipient\EmailRecipientInterface;
use Symfony\Component\Security\Http\LoginLink\LoginLinkNotification;
class CustomLoginLinkNotification extends LoginLinkNotification
{
public function asEmailMessage(EmailRecipientInterface $recipient, ?string $transport = null): ?EmailMessage
{
$emailMessage = parent::asEmailMessage($recipient, $transport);
// get the NotificationEmail object and override the template
$email = $emailMessage->getMessage();
$email->htmlTemplate('emails/custom_login_link_email.html.twig');
return $emailMessage;
}
}Then, use this new CustomLoginLinkNotification in the controller
instead.
Important Considerations
Login links are a convenient way of authenticating users, but it is also considered less secure than a traditional username and password form. It is not recommended to use login links in security critical applications.
However, the implementation in Symfony does have a couple extension points to make the login links more secure. In this section, the most important configuration decisions are discussed:
Limit Login Link Lifetime
It is important for login links to have a limited lifetime. This reduces
the risk that someone can intercept the link and use it to login as
somebody else. By default, Symfony defines a lifetime of 10 minutes (600
seconds). You can customize this using the lifetime option:
1 2 3 4 5 6 7 8
# config/packages/security.yaml
security:
firewalls:
main:
login_link:
check_route: login_check
# lifetime in seconds
lifetime: 300Tip
You can also customize the lifetime per link.
Invalidate Login Links
Symfony uses signed URLs to implement login links. The advantage of this is that valid links do not have to be stored in a database. The signed URLs allow Symfony to still invalidate already sent login links when important information changes (e.g. a user's email address).
The signed URL contains 3 parameters:
expires- The UNIX timestamp when the link expires.
user-
The value returned from
$user->getUserIdentifier()for this user. hash-
A hash of
expires,userand any configured signature properties. Whenever these change, the hash changes and previous login links are invalidated.
For a user that returns user@example.com on $user->getUserIdentifier()
call, the generated login link looks like this:
1
http://example.com/login_check?user=user@example.com&expires=1675707377&hash=f0Jbda56Y...A5sUCI~TQF701fwJ...7m2n4A~You can add more properties to the hash by using the
signature_properties option:
1 2 3 4 5 6 7
# config/packages/security.yaml
security:
firewalls:
main:
login_link:
check_route: login_check
signature_properties: [id, email]The properties are fetched from the user object using the
PropertyAccess component (e.g. using
getEmail() or a public $email property in this example).
Tip
You can also use the signature properties to add very advanced
invalidating logic to your login links. For instance, if you store a
$lastLinkRequestedAt property on your users that you update in the
requestLoginLink() controller, you can invalidate all login links
whenever a user requests a new link.
Configure a Maximum Use of a Link
It is a common characteristic of login links to limit the number of times
it can be used. Symfony can support this by storing used login links in the
cache. Enable this support by setting the max_uses option:
1 2 3 4 5 6 7 8 9 10 11
# config/packages/security.yaml
security:
firewalls:
main:
login_link:
check_route: login_check
# only allow the link to be used 3 times
max_uses: 3
# optionally, configure the cache pool
#used_link_cache: 'cache.redis'Make sure there is enough space left in the cache, otherwise invalid links can no longer be stored (and thus become valid again). Expired invalid links are automatically removed from the cache.
The cache pools are not cleared by the cache:clear command, but
removing var/cache/ manually may remove the cache if the cache
component is configured to store its cache in that location. Read the
Cache guide for more information.
Allow a Link to only be Used Once
When setting max_uses to 1, you must take extra precautions to
make it work as expected. Email providers and browsers often load a
preview of the links, meaning that the link is already invalidated by
the preview loader.
In order to solve this issue, first set the check_post_only option let
the authenticator only handle HTTP POST methods:
1
2
3
4
5
6
7
8
# config/packages/security.yaml
security:
firewalls:
main:
login_link:
check_route: login_check
check_post_only: true
max_uses: 1Then, use the check_route controller to render a page that lets the
user create this POST request (e.g. by clicking a button):
1 2 3 4 5 6 7 8 9 10 11 12 13 14 15 16 17 18 19 20 21 22 23 24
// src/Controller/SecurityController.php
namespace App\Controller;
// ...
use Symfony\Component\Routing\Generator\UrlGeneratorInterface;
class SecurityController extends AbstractController
{
#[Route('/login_check', name: 'login_check')]
public function check(Request $request): Response
{
// get the login link query parameters
$expires = $request->query->get('expires');
$username = $request->query->get('user');
$hash = $request->query->get('hash');
// and render a template with the button
return $this->render('security/process_login_link.html.twig', [
'expires' => $expires,
'user' => $username,
'hash' => $hash,
]);
}
}1 2 3 4 5 6 7 8 9 10 11 12 13 14 15 16
{# templates/security/process_login_link.html.twig #}
{% extends 'base.html.twig' %}
{% block body %}
<h2>Hi! You are about to login to ...</h2>
<!-- for instance, use a form with hidden fields to
create the POST request -->
<form action="{{ path('login_check') }}" method="POST">
<input type="hidden" name="expires" value="{{ expires }}">
<input type="hidden" name="user" value="{{ user }}">
<input type="hidden" name="hash" value="{{ hash }}">
<button type="submit">Continue</button>
</form>
{% endblock %}Hashing Strategy
Internally, the LoginLinkHandler implementation uses the SignatureHasher to create the hash contained in the login link.
This hasher creates a first hash with the expiration date of the link, the values of the configured signature properties and the user identifier. The used hashing algorithm is SHA-256.
Once this first hash is processed and encoded in Base64, a new one is created
from the first hash value and the kernel.secret container parameter. This
allows Symfony to sign this final hash, which is contained in the login URL.
The final hash is also a Base64 encoded SHA-256 hash.
Customizing the Success Handler
Sometimes, the default success handling does not fit your use-case (e.g. when you need to generate and return an API key). To customize how the success handler behaves, create your own handler as a class that implements AuthenticationSuccessHandlerInterface:
1 2 3 4 5 6 7 8 9 10 11 12 13 14 15 16 17 18
// src/Security/Authentication/AuthenticationSuccessHandler.php
namespace App\Security\Authentication;
use Symfony\Component\HttpFoundation\JsonResponse;
use Symfony\Component\HttpFoundation\Request;
use Symfony\Component\Security\Core\Authentication\Token\TokenInterface;
use Symfony\Component\Security\Http\Authentication\AuthenticationSuccessHandlerInterface;
class AuthenticationSuccessHandler implements AuthenticationSuccessHandlerInterface
{
public function onAuthenticationSuccess(Request $request, TokenInterface $token): JsonResponse
{
$user = $token->getUser();
$userApiToken = $user->getApiToken();
return new JsonResponse(['apiToken' => $userApiToken]);
}
}Then, configure this service ID as the success_handler:
1 2 3 4 5 6 7 8 9
# config/packages/security.yaml
security:
firewalls:
main:
login_link:
check_route: login_check
lifetime: 600
max_uses: 1
success_handler: App\Security\Authentication\AuthenticationSuccessHandlerTip
If you want to customize the default failure handling, use the
failure_handler option and create a class that implements
AuthenticationFailureHandlerInterface.
Customizing the Login Link
The createLoginLink() method accepts a second optional argument to pass the
Request object used when generating the login link. This allows to customize
features such as the locale used to generate the link:
1 2 3 4 5 6 7 8 9 10 11 12 13 14 15 16 17 18 19 20 21 22 23 24 25 26 27 28 29 30 31 32
// src/Controller/SecurityController.php
namespace App\Controller;

// ...
use Symfony\Component\HttpFoundation\Request;
use Symfony\Component\Security\Http\LoginLink\LoginLinkHandlerInterface;

class SecurityController extends AbstractController
{
    #[Route('/login', name: 'login')]
    public function requestLoginLink(LoginLinkHandlerInterface $loginLinkHandler, Request $request): Response
    {
        // check if login form is submitted
        if ($request->isMethod('POST')) {
            // ... load the user in some way

            // clone and customize Request
            $userRequest = clone $request;
            $userRequest->setLocale($user->getLocale() ?? $request->getDefaultLocale());

            // create a login link for $user (this returns an instance of LoginLinkDetails)
            $loginLinkDetails = $loginLinkHandler->createLoginLink($user, $userRequest);
            $loginLink = $loginLinkDetails->getUrl();

            // ...
        }

        return $this->render('security/request_login_link.html.twig');
    }

    // ...
}
By default, generated links use the lifetime configured globally
but you can change the lifetime per link using the third argument of the
createLoginLink() method:
1
2
3
// the third optional argument is the lifetime in seconds
$loginLinkDetails = $loginLinkHandler->createLoginLink($user, null, 60);
$loginLink = $loginLinkDetails->getUrl();